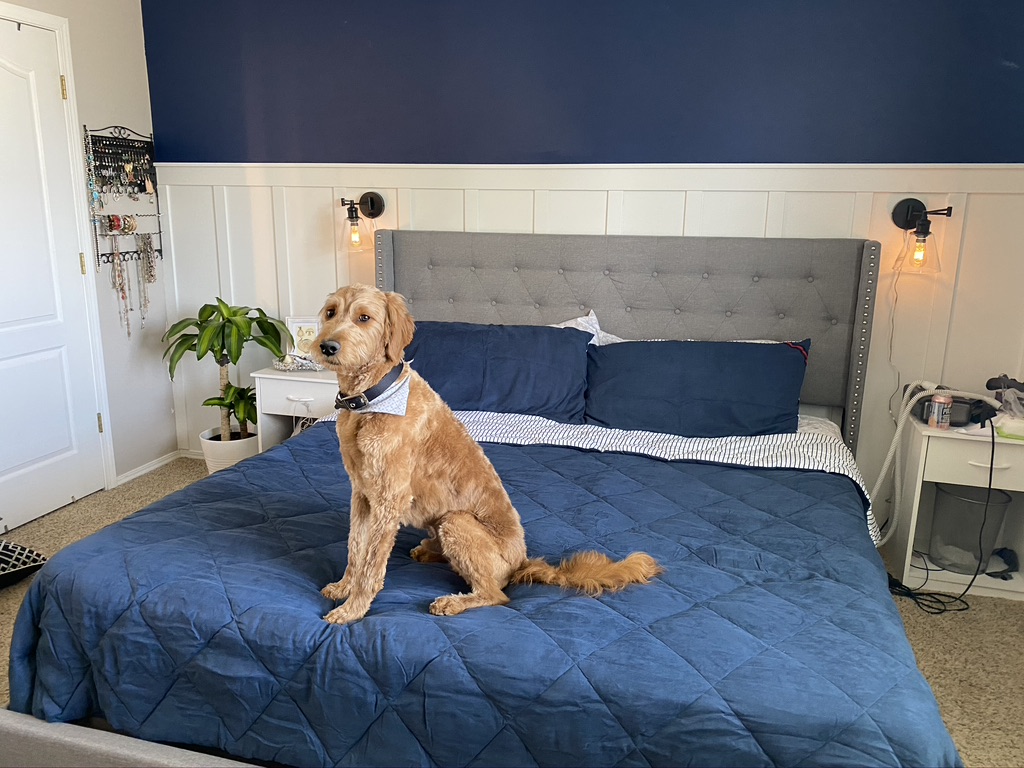
Easy Board and Batten Wall DIY for $100
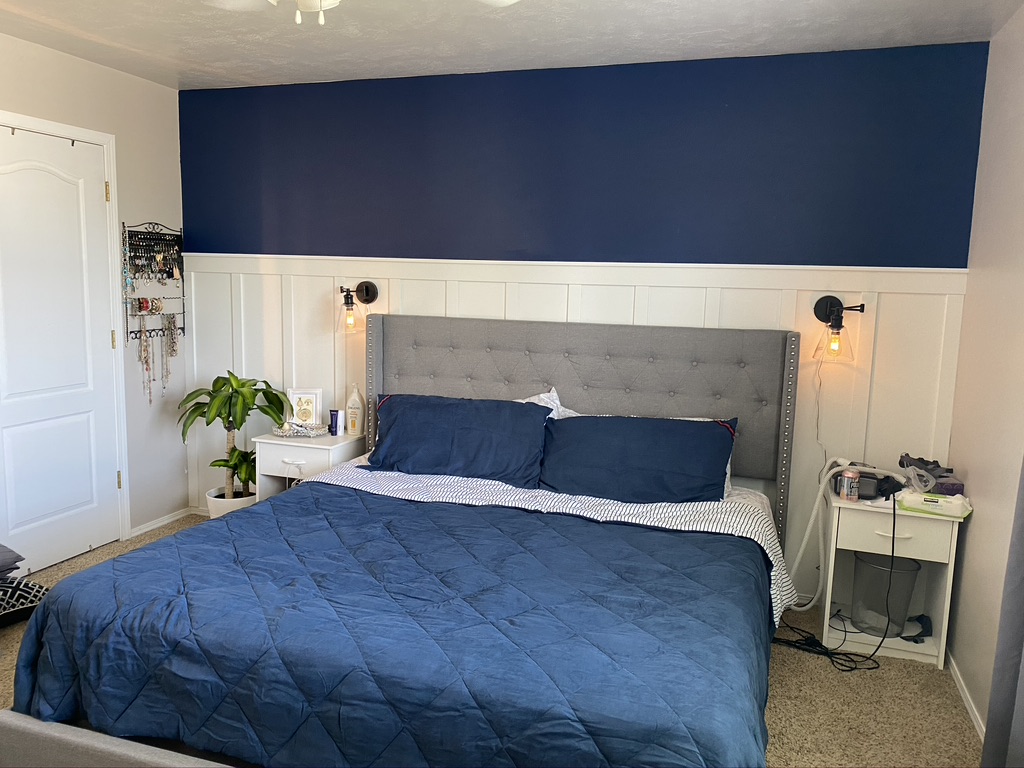
How to update your room with $100
I recently created my first major home update/renovation by making an accent wall in our Master Bedroom. Since being married 3.5 years ago, we have never had an “adult” bedroom. We haven’t had a headboard or ever decorated our various bedrooms. Now that we own a house (and have been here over a year…), I figured it was the time! I was on a tight budget and was able to update this wall for $100!!
I spent a lot of time and effort researching how to install this wall and I have compiled all of that information into this post for you.
Supplies
- Lumber
- Boards – length of wall horizontally
- I chose a 3.5″ primed MDF board (I needed 2 for 13 total feet)
- Battens- length of vertical battens
- I used 2.5″ primed MDF boards (purchased 12, but could have used less) and wanted them around 55″ tall.
- Top board – length of wall across, thinner and placed on top of batten
- 1.5″ board (2 for 13 feet)
- To determine how many, be sure to calculate before shopping! ***
- Boards – length of wall horizontally
- Miter Saw or hand saw with miter box
- Nail gun and nails
- Wood filler or drywall spackling putty
- Sandpaper, sanding sponges, or sander
- Paintable caulk
- Paint
- Paint roller and brush
- Paint tray
- Level
- Rubber mallet (optional)
- Wood glue (optional)
- Plywood (optional)
Lumber
Picking It Out
When it comes to lumber, you have A LOT of choices! I ended up choosing the primed MDF boards for many reasons. First off, they are already smooth, sanded, and primed. They were easy to work with and made the project go a lot quicker. Additionally, they were fairly cheap. However, do not choose MDF if you are putting this board and batten wall in a bathroom or a high moisture area of your home.
Some other options includes: furring strip, common boards, and common bed slats. The cheapest option is the furring strips; however, it is important to be aware that these boards are often curved and have a lot of holes and knots in them. If you choose to go this option, PLEASE pick out the furring strips yourself and do not do a curbside pickup. This will allow you to pick out boards that are straighter and have less holes. Note that you will need to purchase more wood filler and sanding block for these pieces.
Sizing
In a traditional batten and board wall, the horizontal board is the thickest board. I chose a 3.5 inch board. On top of this, I placed a 1.5 inch board as a tiny “shelf.” I originally thought that I would leave these board off, however after installing the boards and battens I felt as though this top small board made it look polished and completed.
The batten’s are the vertical boards. These are often thinner than the large horizontal board. I chose 2.5 inch boards. Originally I planned for 2inch boards, however these did not exist at Home Depot! I now love the proportions of how my wall turned out.
Note: a traditional batten and board wall requires a very flat, untextured wall. This would require you to install another piece of wood on the entire length of the wall, prior to attaching your board and battens. Most people opt for a high quality plywood. You would want to attach this before painting. I opted out of this to 1) save money and 2) save time. My walls are slightly textured, however it does not bother me! Additionally, this may affect the thickness of your board and batten and how it'll look if you leave your existing baseboards.
Preparations
Paint
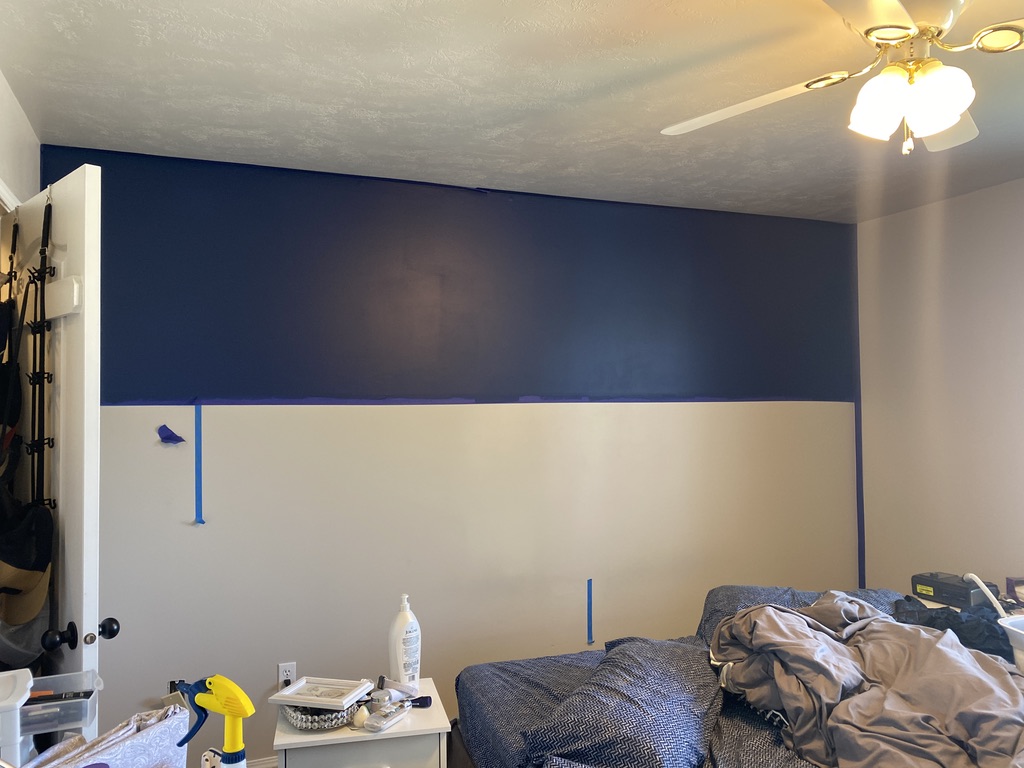
Now is the time to PAINT! Determine how high you want your board and batten wall to go and roughly tape it off. This line does not have to be perfectly straight as your horizontal board will cover it once applied to the wall.
Due to the height of my headboard (47″), I chose to have my board and batten go 60″ tall. I wanted it to be above my headboard so it was noticeable. I also determined this calculation because then the board&batten would take up 2/3 of the wall and my accent would be 1/3 on the top. I have seen some styles that go up 3/4 or more up the wall and I do not love this look (unless you are doing the ENTIRE wall, then that is gorgeous too!).
Clean and paint your walls. I decided to have the top half of my wall be a dark accent – I chose Symphony Blue by Benjamin Moore. I completely painted/finished the top of the wall before starting on the bottom half. I then painted the bottom of the wall Bright White by Benjamin Moore. I only did a few coats of this to get it a mostly uniform coverage, because we will be painting this a lot more!
If your boards are not pre-primed and sanded, do this before attaching them to the wall. The benefit of the MDF boards is that there is no extra step.
More Calculations
Once figuring out your spacing requirements (see calculation post), you then need to determine your height of each batten.
I wanted the top of my horizontal board (3.5″ width) to be at 60″ high on the wall. Then, my existing baseboard is 2″ tall. I opted to leave my baseboards attached as they match the entire house and it was an added hassle/expense. Based on this, I subtracted both 3.5″ and 2″ from 60″ for 54.5″. This is the length that each of my battens needed to be cut to. Please know that walls are NOT perfectly straight or even. I cut the majority of my pieces with 1-2″ extra until I had them in their exact spot and could mark, measure, and cut.
Now I know that my batten’s should each be a little more than 54.5″ long.
If you want to cut your costs down (but add a little more work/time), then you can have the majority of your battens be made of two pieces of wood. This will allow you to get more battens out of one piece of lumber. For example, I purchased 8 foot boards (96″). If I cut the full piece of ~56″ for my batten, I only have 40″ left. This is not enough for an entire batten, but I could use it for half a batten. For each piece of lumber, I could make 1.5 battens.
Cutting
If you have access to a miter saw, USE IT for this project! I started with the plan to use our inexpensive hand saw and miter box, but after about 45 minutes of this I realized I didn’t have the time or energy to continue. While it is possible, just know it’ll much more time consuming. Luckily we had been wanting a miter saw for awhile and decided it was finally the day to purchase it!
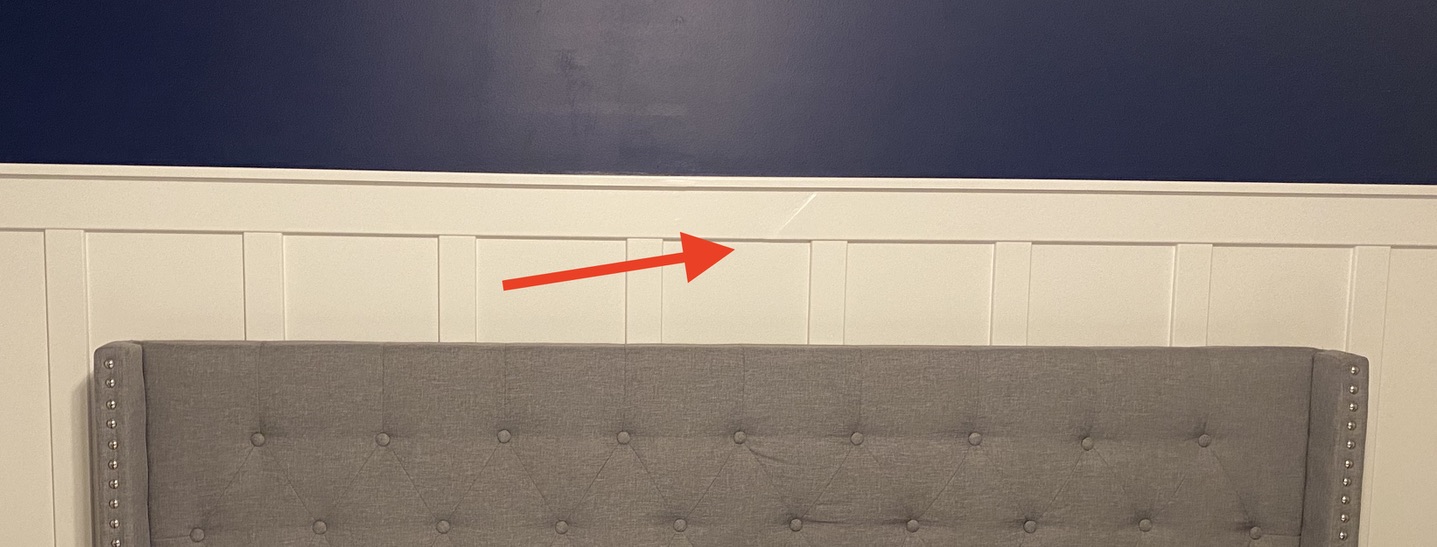
Board – for the board that will go horizontally across the wall, measure and cut each piece. Most walls are too long for only 1 piece so you will likely need to use 2+. To join them together, miter the ends at a 45 degree angle for a more seamless joint. In this photo you can still see this joint slightly.
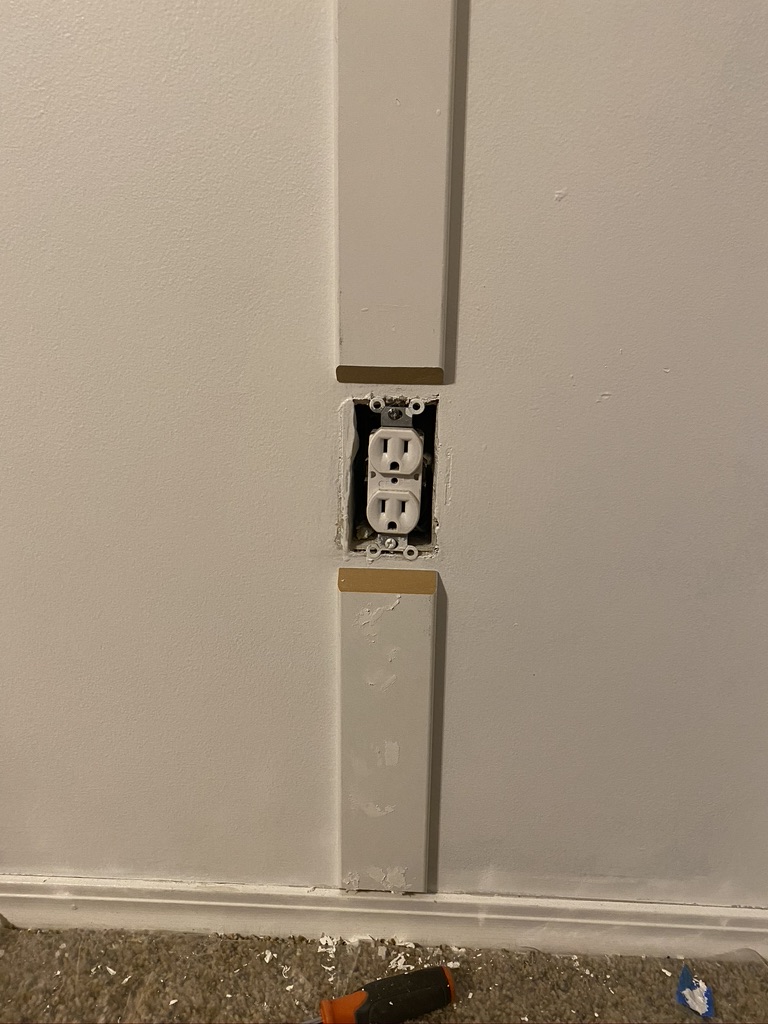
Battens – cut all battens the estimated needed length. If you are not removing your baseboard (like me), you will need to bevel the end of the wood to a 45 degree beveled angle to make it look more polished, professional, and seamless (see photo below with the outlets).
Outlets – If for the unfortunate reason one (or more) of your outlets needs to be covered by a batten, I highly recommend that you try and have the batten fall directly over the outlet. This way, you can cut the batten in half and create a beveled 45 degree angle for each piece. After a lot of research and thinking, this was the best way that I could come up with. Many other blogs recommend only cutting the edge that is touching or extending your outlet and building a platform for it. All of these looked tacky to me AND took a lot more work.
This photo shows the beveled 45 degree cut that I also used for the bottom of each batten to connect with the existing baseboards.
Saving Money
If you want to save money, you can plan on using half boards for the majority of your pieces. This means that instead of having ~54.5″ boards, you could use ~27.25″ boards and joint them in the middle. I had to do this for a few of my boards, but I definitely could have done it on more. If the majority of your wall is going to be covered by a bed (like mine), then I would say go for it! However, if your wall is going to be in a main area of your home, you may not want those seams. While you can make it almost seamless, there will still be a slight line visible.
Installation
Now that you have all your boards cut (to the general length) and the walls painted, it is time to install your board and batten wall! If you can have a second pair of hands to help you, now would be the time I would recommend it!
First: install the horizontal large board across the wall. Measure your wall and attach it at the height that you desire (60″ tall for me). Nail gun on the edge of your board at this height. Then, use a level to make sure the board is straight across the wall. Your board may not be at the exact measurement across the wall, but making sure it is level is more important. If you need to use two boards to go across your wall, install the first and then measure your second board up against the wall. I used a red carpenters pencil so I could easily find my marking.
If possible, find your studs and make sure this board is extra secure into your studs. When using a nail gun, angle the gun in order to have the nails come out at different angles. This will help the boards to adhere to the wall and be more difficult to remove.
Wood Glue: I originally planned to use wood glue AND nails; however, I realized that this will DESTROY drywall if I ever remove it. If you opted to use a piece of wood on your wall before attaching the battens, I would suggest using wood glue and nails. If, like me, you opted out of this step, then I would avoid wood glue.
Second: install the two end boards. You want one on the far right end and one on the far left end of your wall (unless you are doing multiple walls). If your board does not fit perfectly, mark and cut it as needed. I would often use the rubber mallet to help get a tight fit of the batten between the top board and my already existing baseboards. When installing, using the same method as above: nail in the top of the batten and then use a leveler to make sure it is straight. Nail all the way down the batten at different angles.
Third: install the rest of the battens! I cut a guide board of the distance between my two boards to make it easier. I would HIGHLY suggest doing the same! This allowed me to know the exact place where my batten will go. For each batten, I would hold the guide board up and then measure the length of my batten. Almost all battens needed to be cut to a slightly different length (this is why we did not cut them all to the exact length at the beginning).
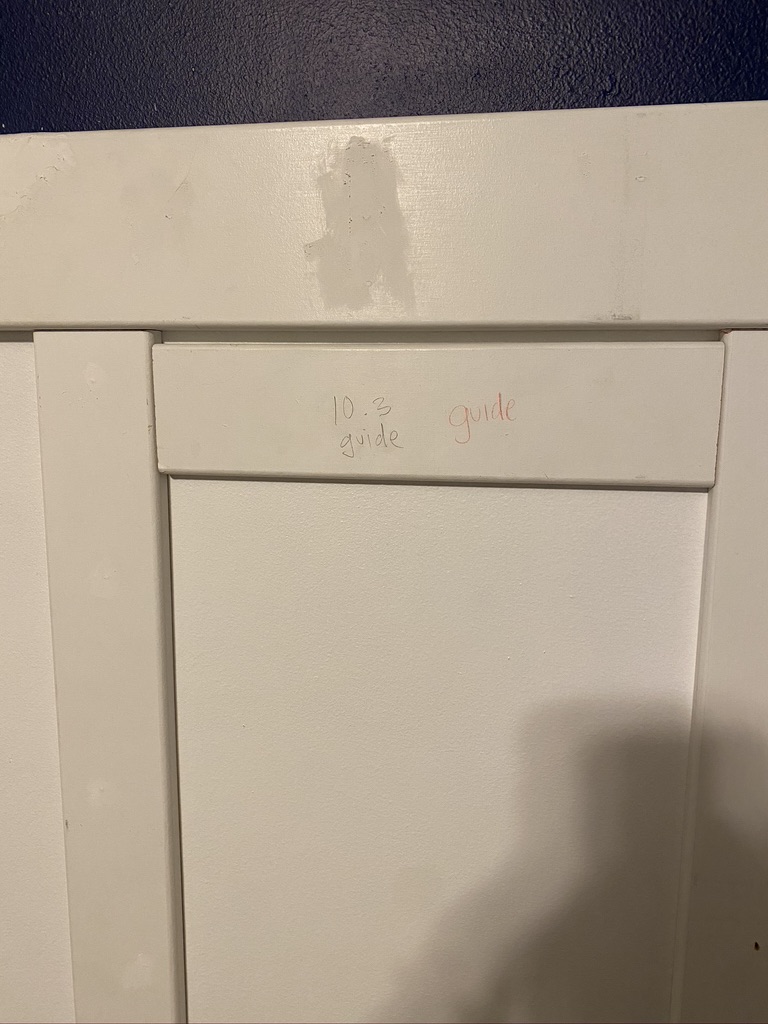
After nailing in the top of the batten, once again use the level all the way down to make sure it is straight. This might seem like a lot of work to measure and level every single piece, but it is worth it!
Fourth: install the top piece. Use the same techniques you have used all along, but instead of placing the board flat agains the wall, you will place it against the large horizontal board. This will create a small decorative finish. I opted for a matching style as the rest of my boards, however you could use crown molding or other framing styles for a more decorative look.
YOUR INSTALLATION IS DONE!!!! (All that is left to do is…. fill all the nail holes, putty any joints, sand, caulk, and paint. I promise, it’s not THAT much).
Final Steps
Fill the holes
Using wood filler or drywall putty, fill all the holes caused by your nail gun and any joints that were created (i.e. that 45 degree angle to connect two boards). It is best to have the filler above the boards.
Sanding
Sand down all the filled holes and joints. Do not over sand or you will have to start over (yes… I did this). I like using sanding sponges because they are easy to hold and I am able to control the speed (how fast my hand works!).
Make sure the wipe down the entire wall and area once you are done sanding. I found it very helpful to actually vacuum the wall and floor first and then wipe it down.
Caulking
Using a paintable caulk, fill ALL gaps. This will be anywhere the boards connect together or touch the wall. This will help if your wall isn’t completely straight (which I can almost guarantee that it isn’t) and it will allow it to look more built in. I was hesitant about this step, but it actually made a huge difference. I caulked ever seam on the entire wall.
How to caulk: using a caulking gun, apply a very small line of caulk along your seam. Using a wet finger (I liked using my pinky finger because it’s small), wipe the excess amount and make sure it fills the seam completely. I found having wet paper towels and a bowl of water handy was the best method!
Paint
Last, but not least, paint that dang board and batten wall! Although my primed MDF boards looked “white” because they were primed, they still required multiple coats of white paint. I painted both the wall and boards/batten for the a few layers and then I just painted the MDF boards for the last 2-3 coats. I did very light coats to limit drips and am glad I look the extra time for this.
THE END
You. Are. Done. You did it! Doesn’t it feel great and it is worth it? I want to spend so much more time in my room after building this wall. Now go enjoy your super professional looking board and batten wall.
If you want to see where I got some of my room ideas, look for a future post coming soon.
Total Cost Estimate:
- MDF primed boards: $58 (could have been less if I did more half boards and jointed them!)
- Paint: $25
- Caulk: $2
- Putty: $6
- Various supplies: $15
- TOTAL: $106!!
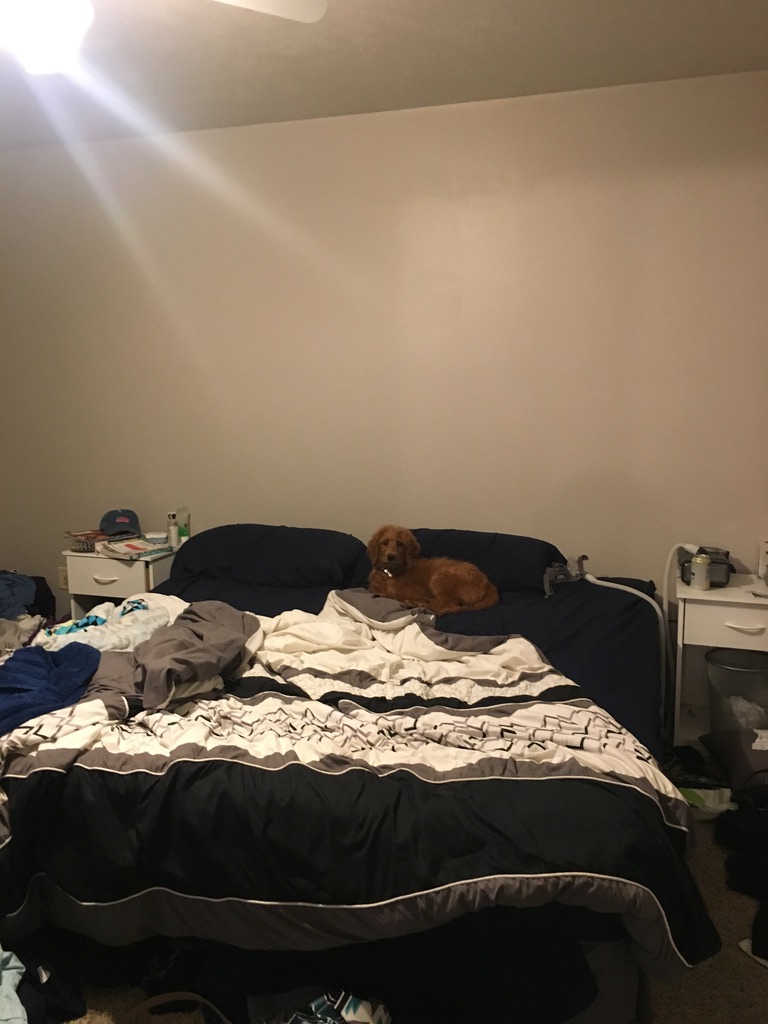
BEFORE & AFTER:
Same dog, same room, whole new look!
